Friday, January 23, 2009

Toasty Edamame!!!


Snacking is my favourite past time. I am always looking for something to munch on-- Pita chips with any kind of hummus, tostitos with salsa or simply a bag of potato chips or corn chips.......ummmmmm yummmmmmmm!!!!

Well who doesn't like all this options, packed and ready just waiting for you in the grocery store!!


If not for the health reasons, I would have never went out of the box and considered the little shelled edamame to be a part of my snacking ritual....:)

For those who don't know what the edamame and it's benefits are, ...well here they are...:)


It's basically known as a Soybean. One of the part that attracts me more is it's low sodium, fibre rich food. Besides having high protein content edamame also help:
  • Reduce risk of breast cancer in premenopausal women
  • Decrease the risk of osteoporosis.
  • Promote prostate health
  • Protect cells with their antioxidant properties.
WOW!!! who knew?? right??

It's interesting how much we underestimate (or simply forget?) about these wonderful products when we cross the aisle and stop to grab a pack of Ice cream instead.....,.........,...

Anyways...So Soybean or edamame for that matter is a legume and so this entry goes to an event My Legume Love Affair Seventh Helping hosted by Srivalli.

and here is the link to Susan's event page.


[MLLA7Logo.jpg]


Just when I was browsing through the blogs, I came across the recipe of roasted chickpeas. I wanted to try the same, that's when I remembered I have half a bag of cute little edamame in my freezer that I bought a week or two back to toss with my salad. My colleague in my previous company used to add this healthy kids in to her salad, and that's the reason I wanted to try those. Although I must admit I didn't really liked the raw and kind of bitter taste of edamame in to my salad.

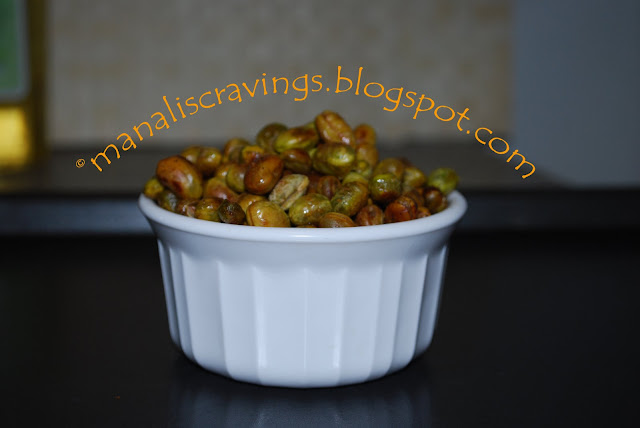
With a due respect to it's nutritional value, I then decided to turn them in to a snack, just by roasting them in the oven with the spices of my choice.

Only 3 ingredients (excluding edamame) makes this a yummy fulfilling snack and a great substitute for unhealthy, guilty inducing potato chips.
  • I used Half a bag of frozen edamame;
  • Salt to taste;
  • Chili powder to taste.
  • 1 tbsp Olive Oil
Wash the edamame under running cold water, and it will have the same effect as the defrostation. Take away the moisture from the edamame by spreading them on a paper towel.


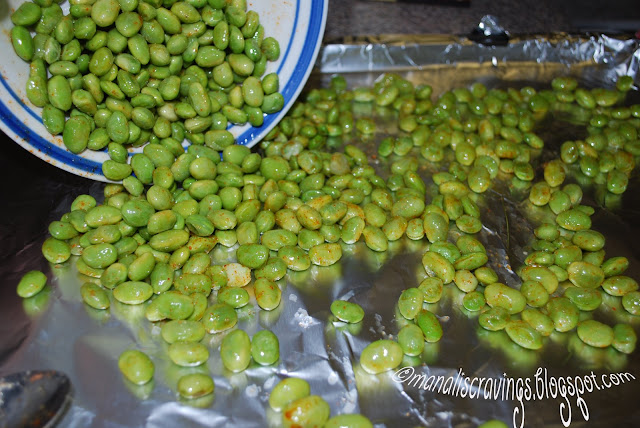
In a bowl, mix edamame, salt, chili powder and the olive oil. Mix them well.


Line the cookie sheet with an aluminium foil and spread the edamame's on the sheet.


Preheat the oven to 375° F. Let the edamame's roast for 20 minutes.

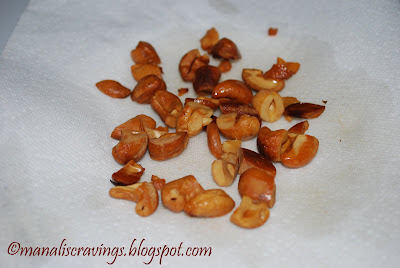
It will have a crunch on cooling. Use it as an afternoon snack or simply toss with your salad as a great substitute for croutons.

Enjoy....:)


Tuesday, January 13, 2009

New year's feast- Biryani......:)

My first post for the year 2009.

A very happy new year to all the readers and bloggers out there!!!

Let me start my first recipe for the year 2009 by sharing my all time favourite, yummy....Biryani!!! 
I always need a reason to prepare biryani, just because it's a really time consuming preparation. I guess it's better to invite a few friends over and enjoy with them. I invited few of our friends over,( G and A, and V and K)  and shared a nice lunch with them. I made Vegetable Biryani, Potato and spinach parathas, raita and blueberry smoothie as a dessert.

This was my second attempt...and pretty much successful!!

Here is what you will need....The list is really long...don't quit...:)) It's worth all the pain, so stick around....:)
  • 2 cups of basmati rice
  • Canola oil- 2 tablespoons
  • Whole garam masala
  • Shahi Jeera (Caraway seeds)
  • Ginger garlic paste
  • vegetables (Cauliflower, carrots, Potatoes) Cut in to big chunks.
  • Mint leaves
  • Coriander leaves
  • Green chillies, chopped in to big pieces
  • Store bought biryani masala- whole packet.( saves your efforts....big time...:)  )
  • Yogurt- 1 cup or more if you feel.
  • Cashews, almonds/nuts (of your choice)
  • Paneer- store bought, cubed
  • Half red onion - sliced
  • A pinch of saffron soaked in water.
Follow the steps, and keep your stomach empty to give your recipe a justice!!!

Before you go further, take a pinch of saffron and mix in  some water, mix well and keep aside. We will be using this later in layering.

Step 1:
Frying the onion and the cashews, almonds/nuts (of your choice) and the paneer cubes
This will give the royal touch to the biryani.
Slice half red onion thinly, take 1 tbs of canola oil in to a pan. while the oil is hot add the sliced onion and fry until they are slightly shy to brown. Keep aside and cool. They will have a nice crunch on cooling.

Add cashews to the pan and shallow fry them as well. Remove when they turn brown. Keep aside to cool.
Also shallow fry the paneer cubes and keep aside.


Note: I keep saying that you shallow fry them, that's just to cut down calories. If you want, you can go ahead and deep fry them. After all it's a royal new year's special.

Step 2:
Soaking the rice-:
Soak 2 cups of rice in water for half an hour.

Step 3:
Prepare your veggies-:
Add 2 tablespoons of canola oil in a pan. Add whole garam masala (includes 2 sticks of cinnamon, 3-4 cardamoms,  2/3 cloves, 2-3 black pepper whole, a bay leaf) Saute for a minute and add shahi jeera. Wait until that splutters. Add ginger garlic paste (made up of 2 big /4 small garlic cloves and an inch of ginger)


Step 4:
Finish your veggies-:
Add cut vegetables. Saute the vegetables until they get nice brown coating on them. Add a little salt while sauteing them. Our goal at this step is to cook the vegetables until they are about 70% done. 

Add mint leaves and coriander leaves. 
Do not chop the leaves finely, just give them a rough chop before adding.

Then add chopped green chillies. Add biryani masala at this point.
Make sure that you mix all the vegetables with all the masala, and coat the vegetables completely.


Step-5: 
Coat your veggies-:
Add half a cup of yogurt to the coated vegetables. Add paneer cubes and mix everything well, to coat all the vegetables and paneer with yogurt and vegetables.

Heads up- In step 4 and step 5, your vegetables should be 70% done. You can check on them by inserting a knife in to a piece of vegetable. You should feel some tension while inserting the knife, it should not be the straight and easy cut.

Step 6:
Cook the rice-:
Bring a pot of water to boil and add the soaked rice to it. The goal is to cook the rice up to 70%.
If you soak the rice for half an hour, it will be cooked to 70% in about 7-8 minutes. If you soak it for an hour, it just takes 3-4 minutes. Add some salt black pepper whole, a cinnamon stick and a bay leaf in the boiling water for flavour. Drain the rice.
Note: when you boil the rice in to the water, make sure to add enough salt, as this will be the only way add any  flavour to your rice.

Now that your rice and your vegetables are 70% done. Here comes the fun part of layering.

Step 6-:
Layering.

Layer 1:
Divide the vegetables in to half. In an oven proof pot, spread the vegetables. Add remaining of the yogurt to the the vegetables, and mix well. Add the cashews/nuts.  

Layer 2:
Spread half of the rice on top of the first layer of vegetables. Now here is the time to use the saffron water that you kept aside. Sprinkle 1/2 tbs of that water on to the layer of rice. This will give your rice a nice saffron color and aroma.


Layer 3:
Spread all the remaining vegetables on top of rice layer. Spread the fried onion on the top of vegetables.

Layer 4:
Spread the remaining rice on to the top. 


Sprinkle the fried onions and the fried nuts on top.


Sprinkle some mint and coriander leaves on top.( I forgot to do that..but you should not....:P).
Last but not the least sprinkle the remaining saffron color.


oooooofffffffffffffff....and we are done!!!
Cover your pot twice with aluminium foil and put a lid on to it. And now it's time to go in to the oven.
Preheat the oven to 375° F.  Let it be in the oven for about 40 minutes. 

Get ready to taste your efforts, I am sure it will be worth it.

Courtesy ::  Vah chef